Basic Gear and Gem set-up illustrations

citrine gemI have noticed a trend on Line in the last few weeks, and I feel stupid for not doing this sooner. It’s really simple: A picture says more than a thousand words. And over the past few weeks, I have seen plenty of illustrations/pictures that depict certain elements of the game, as a short guide so to speak.

And if we look at gear and gems for example, I have articles on Best gear Sets, where and how to use Gems, which gear attributes go where when…and then we have Hero Skills going in the mix as well….

And although they are good reads to get familiar with he material, it’s mostly text and not suited for quick referencing. And while chatting such as in Line, it is much easier to give a picture than explaining it word by word every time. So here below the fold I have posted some illustrations for basic gear/gem set-ups. I know other versions are also around, but hey, I like some photoshopping and I like it to be available on the site.

Feel free to download them and share them on for example Line, whenever a tournament starts again and people start asking the same questions.

Continue reading

Hero Skills: When to use which?

skill morale boostHero Skills have been released for a while now, with even a new batch of offensive Skills released recently. But which skills are best in certain situations? In this article I while detail a number of situations and sketch a number of ways on which Skills are most useful in each. Some are very straightforward, others require some more thought. In the end, this will not be a long or difficult read, but could be helpful to some…

  • 1. Types of Skills
  • 2. Attacking general
    • 2.1 Attacking wall/advanced
  • 3. Defending
    • 3.1 Defending wall/advanced
  • 4. Campaign general
    • 4.1 Boss level double-tap
    • 4.2 Advanced campaign set-ups
  • 5. Mining
    • 5.1  Mining warfare
  • 6. Resource production
  • 7. Final words

Continue reading

CHS: The double-tap

smaug thumbnailFor most levels in campaign, attacking them is straightforward. You select an army and hero to attack, attack, and presto….you either win or lose. Whatever the case, the next time you attack that camp, the camp has been reset and all Goblins are there again.

But on the boss levels, this is different, and losing on those maps will leave the remaining Goblin force waiting for you for the next round of combat. How many Goblins still stand is indicated by the boss health bar when you click on the level.

It is been long known that finishing off the boss levels in multiple attacks also gives (potentially) much higher High Scores, if done properly. But not many people know how or why this is. In this article, I will provide some information on why this is and how can you can figure out your best attack pattern.

Continue reading

Best Sets lists and how to use them

thorin furWhile I used to post a screenshot of the top 30 offensive and defensive gear sets with the Best Sets article, I have now provided a link to a zip file which contains the two spreadsheets I use for that, containing all of the hundreds of possible gear combinations. In order to work with it or understand them, I will provide here a short explanation of what each number represents, and how you should use it to compare gear.

  • 1. First off: Division, Gems and random rolls
  • 2. The numbers explained
  • 3. Using the list effectively

Continue reading

Update 12.4: New Skills/Hero lvl/buffs/troops…

Update 12.4 hit the stores a few days ago. And like most updates, it added quite some new features/additions to the game, or showcased what is to come shortly. In no particular order the updates are:

  • 3 New offensive Hero Skills: Spearhead II, Bullseye II, Close Quarters II. Their information has been added to the Hero Skills article.newskills
  • Permanent debuffs added, in addition to the perm buffs. Weapon Disarm (attack debuff) and Armor Exposure (life debuff) items function in similar fashion to BC/SW.newbuffs
  • New T4 wall troop: Stone Sheperds (elven) / Gates of Erebor (dwarf). Apparently they are set up as equivalent to Stone Giants for Wall Troops, with massive health, although first testing showed inconclusive results. At the moment, only six can be trained once. Adding to the Wall Troop article as soon as more concrete info comes out.newwalltroop
  • New Tactical Troop: Enchanters. A new troop sporting both high defense and offense stats. Although not shown anymore, lvl 120(!) is needed to train these. More info will be added to the TT article as soon as more info becomes available.new tt
  • Increased player lvl. There is good reason to think (see above) it won’t be long before the player level cap is raised from 100 to at least 120, to train the Enchanters.
  • Increased Hero lvl.  Another cap raised is Hero lvl. A glitch a few days ago enabled players to level their Heroes beyond 250. This was then revoked, but with the update it is now official: Hero levels now go up to 280!

So that’s it for now. Let me know how you feel about the new stuff, or share any information you might have 🙂

Battle Mechanics V: Conclusion

headerWelcome once more to the final part in this series for now. Warning up front: This article will not contain (much) new information, but will serve, as the title implies, as a conclusion on the previous parts I-IV, summarizing the findings, and perhaps serving as an easy reference piece. So let’s go over what we covered in the previous parts.

Continue reading

Battle Mechanics IV: Diminishing Returns and how to deal with it

attackWelcome to the fourth installment in this Battle Mechanics series. In this part, we will once again take a closer look at Diminishing Returns, how it works, and how it influences our choices for gear and Gems, following the formulas we arrived at in parts I, II and III. Diminishing Returns (henceforth DR) can be a tricky subject, but once you understand how it works it is actually pretty easy to work with.

  • 1. The concept behind DR
  • 2. DR visualized
  • 3. DR and distribution of buffs and debuffs
  • 4. Should you always balance buff and debuff?
  • 5. Conclusion on choosing gear with DR in mind

Continue reading

Battle Mechanics III: Why your opponent doesn’t matter

skill fierce loyaltyWelcome to part III in this Battle Mechanics series. In part I and II, we constructed the basic battle formula with buffs and debuffs, focusing specifically on gear buff and debuffs. Now it is time to chose the optimal set of gear. But before we get to that, we consider here our opponent. Many people still tell me that I have to take into account the opponent’s gear when choosing my own, in the sense that (usually), if an opponent has mostly debuffs, I should aim for buffs, and vice versa.

In part IV, we are going to (for the last time hopefully) discuss our own gear choices, taking Diminishing Returns into account, but here in part III, I will first briefly detail why you should never look at your opponent’s buffs and debuffs distribution.

Continue reading

Battle Mechanics I: The basic Battle Formula

tauriel bowWelcome to the first in a series of articles on some basic battle mechanics in the Hobbit | KoM. In this series, we are gonna look at how combat in KoM basically works, and how it affects your gear choices. In this first part, we start of with looking at the basic battle formula, and work from there towards choosing the best gear set-ups, emphasizing primarily the reasons behind the sets such as given in the Best Sets article.

  • 1. The basics
  • 2. Adding in buffs
  • 3. Adding in debuffs
  • 4. Rewriting and final formula

Continue reading

Tournaments: Alliance Boss Kill

THE HOBBIT: THE DESOLATION OF SMAUGThe Alliance Boss Kill tournament got introduced shortly after the introduction of Alliance Bosses on the campaign map. During normal play, the Bosses can be summoned and killed to receive rewards including Vala Stones, gear, Valto runes and Gatherer Stones to level up your City Guardian. During Boss kill tournaments, you get points for killing the bosses. It is a pretty straightforward principle, so this article wil not be that long or complicated.

  • 1. The basics
  • 2. Scoring
  • 3. Tactics
    • 3.1 Go for the highest Boss(es) only
    • 3.2 Use you attack Hero/gear
    • 3.3 Set your timers
    • 3.4 Spending can seal the deal
  • 4. Conclusion

Continue reading

Why the new Gems will mess up gear choices…

citrine gemOne of the most popular articles on this site is the Best Sets article, describing which sets of gear are most useful for attacking, defending, and for campaign/CHS. At the moment, this article is still very useful, but pretty soon, it will be completely rendered useless. Why? The new Gems. In this article I will explain why this is the case and how gear will be chosen in the near future…and why this makes me think the new Gems stink….

  1. The new way of selecting gear
  2. Why will gear selection change? The old situation
  3. The new situation: The new Gems
  4. The new “best” gear
  5. An example with Replenish and Void gear
  6. Does diminishing returns not factor in at all anymore??
  7. What did I leave out

Continue reading

Input needed on Debuff mechanics

In relation to Hero Equipment and Gem Embedding, I wanted to do a piece on how to balance buffs and debuffs. For that of course, we need some understanding of the “Battle formula”. Now for attack and life this is rather straight forward, something like:

Troops killed = (Life*life buff) / (Attack*attack buff)

life debuffBut the debuffs factor in in some other way, and I would like one of you to fill me in on how, as I cant get my head around it for some odd reason, while my instincts tell me the math cant be that hard. Problem with debuffs of course is that they cannot reduce attack or life of the enemy to zero. So while 100% attack buff doubles your base attack (+100%), a 100% debuff will not reduce base attack or life to zero. So how does it fit in the equation? My guess from the above here is that buff and complementary debuff do not interact directly, like:

Troops killed =
(Life * (life buff(?)life debuff))
(Attack * (attack buff(?)attack debuff))

But more something like:

Troops killed =
((Life * life buff)/(1+life debuff))
((Attack*attack buff)/(1+attack debuff))

So in short, any help on this would be appreciated. Some time ago, someone either commented here or sent me an email with some info on this stuff, but I cannot find it anymore….Thanks in advance!!!


Finally: Troop attack orders updated…

LT pikemenPhew. Finally! I didnt like doing it, but I figured out all the new troop attack orders and updated the graph that goes with the article. I had to figure out the orders for the new Lake-town troops, and of course update all the orders for the older troops to see where those two figured in.

In short: For the Lake-town troops, the order is identical to the normal Tier 1 to 5 troops. The Pikemen are mostly found near the front of the other’s attack orders, while Longbowmen stay at the back, as their descriptions hinted.

Master Rangers‘ order simply adds the Lake-town troops in their normal positions, but switches Mammoths and Longbowmen in the back.

Stone Giants remain largely the same as Tier 1-5, with the biggest difference being the Pikemen moving more to the back of the queue.

Lyncean Raiders‘ attack order was already a bit messier, and the Longbowmen are now killed before Woodsmen even, while again the Pikemen move back to behind T1.

Woodsmen place the Longbowmen back at the back of the line, while again the Pikemen are staying away from the front.

So once again, take your advantage with this information for TKing, and let’s hope Kabam does not release more new troops any time soon….

City Buildings: the City Guardian

guard headerAs soon as you open your city, it’s there: The City Guardian. A large statue in the middle of your city, seemingly more decorative than functional. But the City Guardian actually functions as a protector of your City, providing very useful buffs that will certainly help even the most experienced players. In this article, I delve a little deeper into the Guardian and give an overview of how it functions.

Continue reading

City Buildings: the Sage Tower

headerThe Sage Tower acts as the event center of your cities. Uniting your cities, only one center can be constructed, serving all your four or five cities. Items won in special events can be exchanged in the Sage Tower, while other items such as gear and Gems can be exchanged for materials acquired in campaign primarily. As there are a large number of Sage Tower trades, this articles is meant to give an overview of these for less-experienced players.

Continue reading

Hero Equipment: How and where to Embed Gems

Gem Embedding enables players to make their gear perform even better in war, enhancing attack, defense, and/or march sizes. But the higher level runes are difficult to acquire, as it takes to 1 year and 8 months to just farm one level 6 Gem from scratch with the picks regenerating for free. Although we are helped by Gem Shards and Gems in chests and tournaments, it’s still inefficient to just start combining them to level 6 Gems, so choices have to be made.

In this article, I will look at what the Gems do in each gear piece type, what gear should be Embedded first, and how to most efficiently upgrade Gems along the way.

  • 1. Buff types and Gem effects
  • 2. Diminishing returns
  • 3. Best Gem Embed gears
    • 3.1 Offensive
    • 3.2 Defensive
    • 3.3 Campaign
    • 3.4 All-round set-up
  • 4. Efficiently upgrading Gems

Continue reading

Campaign: The new Smaug

smaug thumbnailLast week we received news the New Smaug was introduced. It was highly anticipated, and  a lot of players took to the forum to explain Kabam how NOT to ruin the experience in the process of upgrading the dragon. Unfortunately, the new Smaug was highly disappointing and was met with a lot of negative feedback.

But in a surprise move, Kabam decided to listen to the critiques within a week and upgraded Smaug again. Read on to see what has changed form the old familiar lizard and a possible way to fix him once and for all…

Continue reading

Troop Attack Order

Updated with all new troops and attack orders! 14-01-2015

D_Dwarven_PhalanxBack in the days of Tier 1-3 and Wall, we knew which troops would be targeted first by an attacking army. Wall troops die first, then Tier 1-3 fighting troops, then lastly the supply troops. This held no matter what troops you sent at a city. The only ‘exception’ to this was the fact that a Dwarf army would (and will) attack Elven reinforcements first and vice versa, leading to the infamous cart rein shenanigans.

But unfortunately for us, the Tactical Troops messed this up, as they seemed to prefer other targets over the Wall troops to attack first, flanking the enemy armies and attacking the weak points at the back. For some Tactical Troops little changed, but for some, the order in which they attack enemy armies is a mess. This post lists all the attack orders for all troops available in the game right now, and will be updated when the new Tactical Troops are introduced.

Continue reading

Hero Equipment: Mining Gems

dwarf pickAs proposed earlier, I have put this subject in a separate article, to keep the information on both Gem mining and Embedding separated and thus hopefully easier to comprehend. The main purpose of mining in Kingdoms of Middle Earth is to acquire the Gem Shards needed to make the Gems used for embedding in gear.

Here I will give an overview of the things necessary to find the mines on the map, mine them successfully for Gem Shards, and other possible benefits from mining. To mine we need to know the following things:

  1. What is Mining exactly?
  2. What types of Mines are there?
  3. How do you find Mines?
    • Watch Tower
    • Search Results
  4. How do you start mining?
    • Attacking a Mine
    • Mining progress and report
    • Reinforcing a Mine
    • Gem Pouch research
  5. What are the possible drops?
  6. Defending Mines
    • Strategy
    • Use in TKing
    • Alliance agreements

Continue reading

Hero Equipment: Diminishing returns…

attack debuff
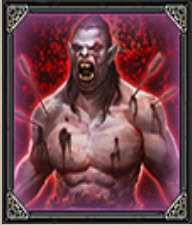
Or, you CAN have too much of a good thing….Remember this old post about how each consecutive bonus to a certain process becomes less effective than the previous one? I’ll illustrate shortly with an example. Say you attack some goblins, and your attack value is 100, and you kill 100 goblins.

Now you have 2 items. One increases you attack by 100%, or 100 points, and one reduces the goblins life by 50%, or half their life. Which item do you use? Well, in the first round, it doesn’t matter. Applying the attack item doubles your attack, so you kill twice the amount (200) of Goblins, while the life reduce item also results in double the amount of kills.

We apply the attack item, so attack is now 200 and Goblin life still 1. Again the question, what item do you apply now? Now we see a difference. If we apply the attack item again, our attack becomes 300 and we kill 300 Goblins, not 100%, but 50% more then before. But if we apply the life item now, Goblin life is halved and we kill 400 Goblins, a 100% increase.

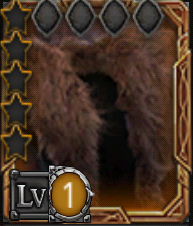
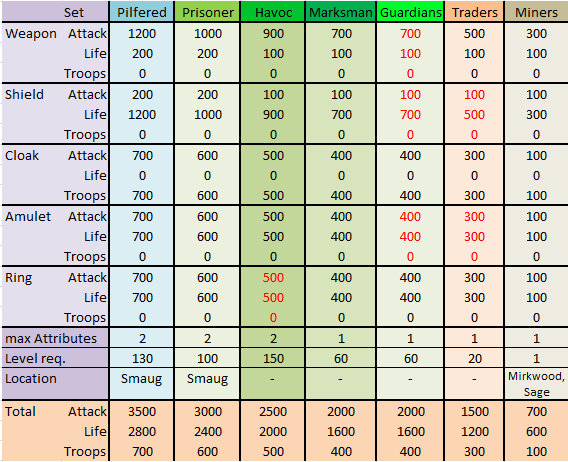
And that is diminishing returns for ya: each consecutive added bonus becomes less effective -in this case the attack bonus- , such that other bonuses become more and more effective when used…Now, up until now, this was never an issue with gear because the gear bonuses were not THAT high to make it really noticeable. However with the Replenishing and Necromantic sets, we get introduced to this effect very distinctly, because the bonuses they offer are so incredibly (in my view ridiculously) high.

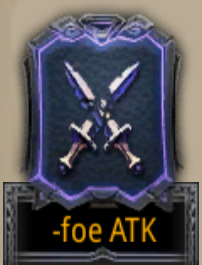
And that is the reason why a full Replenishing set is LESS EFFECTIVE at defense compared to a mix with Void gear. Individually, the Replenish set is much better. Equip a Hero with Void sword and Replenish Sword alone, and you will see the Replenish sword do better at defending. Test a FULL Replenish set against a FULL Void set, and Replenish wins again. But, because the +life bonus of Replenish is so high, it’s diminishing returns is likewise really high, even so that it makes adding in Void gear work better with its -foe attack bonus. It is exactly like the Goblin example above. The more you use of one, the less effective it becomes and the more worthwhile it becomes to use the other…

And this will make finding the perfect gear set-up more difficult and experimental in nature then it used to be. Please take note of this. When newer, even better sets come out in the future, do NOT mindlessly equip the full set, but mix it with gear with different types of offensive and/or defensive buffs to see whether diminishing returns plays a role (and it will), to come to the best mix of items….Cheers!
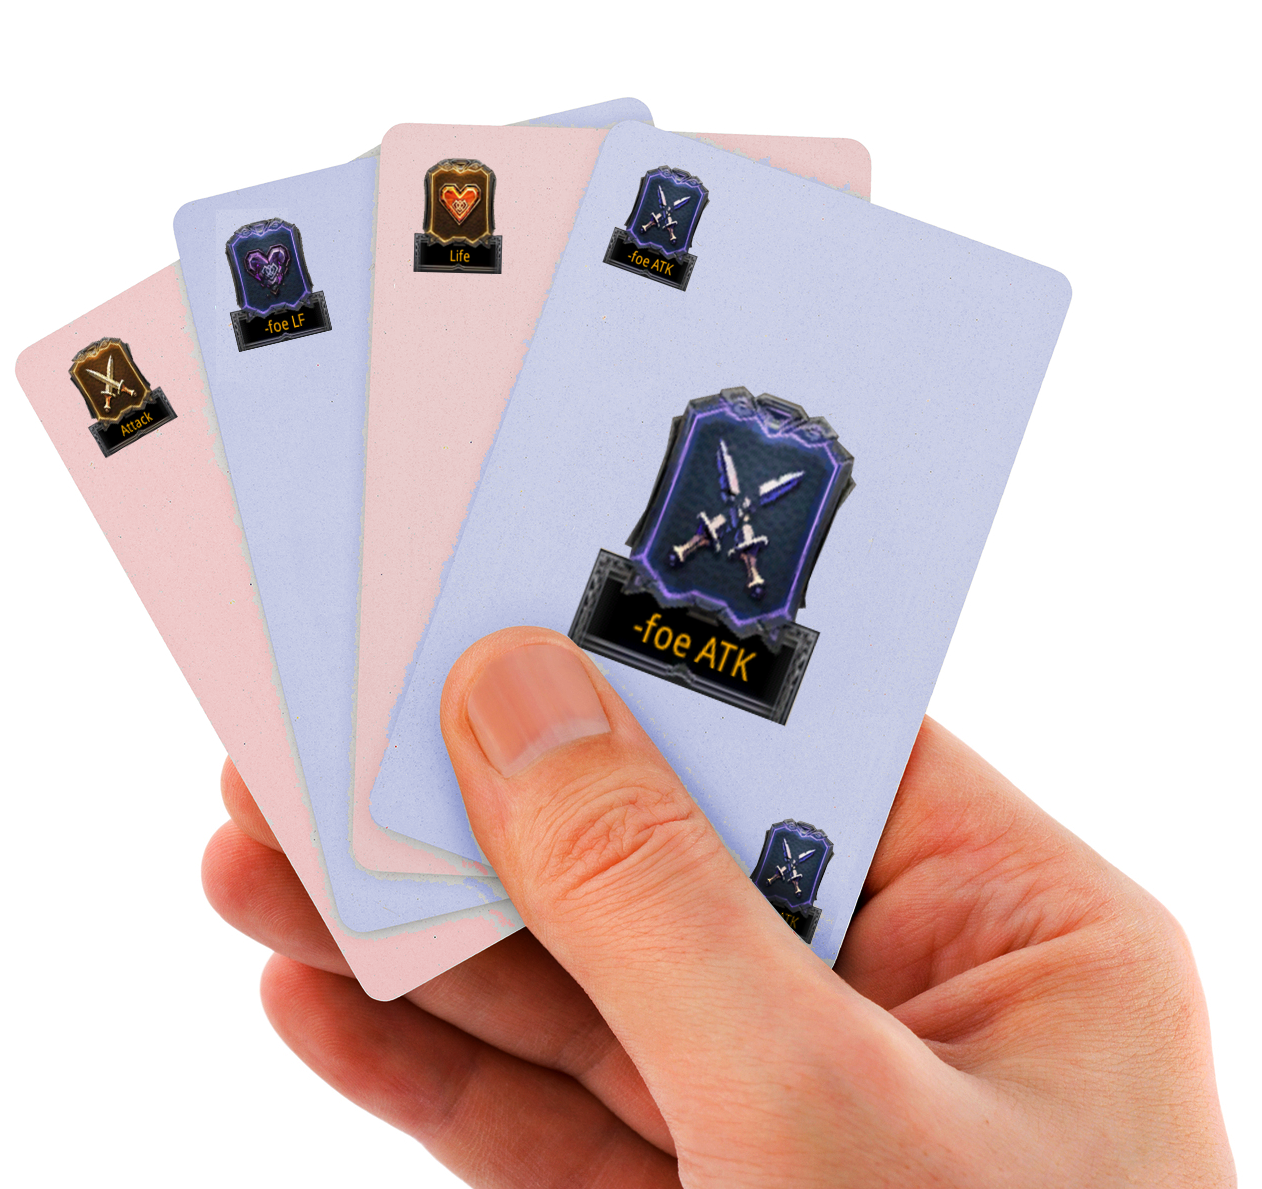
Gear bonuses and when to use what gear

article headerSo a while ago I made a post about when to use Attack runes and when Defense runes, as there seemed to be confusion about it even among more experienced players. I recently noticed the same problem with using gear, so I thought it time to write an article on that as well. Especially with the new debuff attributes, it has indeed become less intuitive to know what to use when. In this article I will try give the basics on the available gear attributes, and on when they are best used.

Continue reading

Hero Equipment: Best sets to use

pilferediconOne of the questions on everyone’s mind in this game is what the best hero equipment/gear are for attacking, defending and campaigning. With a pretty constant stream of newly introduced gear with differing bonuses, it can be difficult to decide. So here is a small overview of the best sets currently available, below the fold, as the article has grown a bit longer than anticipated.

Continue reading

KoM 101: Farming made easy

small-farm-tractorsPerhaps not long awaited, but certainly long planned…my post on farming in Kingdoms of Middle Earth. Farming resources from other players is on of two ways of gaining resources, the other being producing it yourself in your cities. Farming other players however, is vastly more profitable than producing, and so will quickly become essential for your might growth, if done properly of course.

In this article, I will explain to you my method of farming. I know there are many methods and styles to choose from, so if you don’t like this style that’s ok. I’ve just found that it nets me more than enough resources in a short time, trying to be as efficient as possible. It will take some effort to set up, but once working, will really ease your farming trips.

Continue reading

Campaign: Temporary maps

campaign mapOne of the later additions to the game has been the introduction of temporary campaign maps. These maps appear at seemingly random times every now and then, and disappear again as well after usually a few hours. I thought about including them in the campaign spreadsheet, but seeing as I am not convinced they will be reused, I will write here a small article on how I think you should generally approach these and what the potential rewards are (and they are pretty good).

Continue reading

Attack and Defense runes: When to use them

alone ROFI was tempted to put this article under the KoM101 category, but realized this actually isn’t that simple, going by the mistakes I see people make in attacking and defending. I’ve seen some weird attack reports, with people misusing runes and Tactical Troops.

alone ROIIn this article, I am gonna lay out the basics of when to use defensive, and when to use offensive runes. By no means is this stuff really complicated, but apparently many people still do not have a complete hang of it. So when do you use which runes? That and more, after the break.

Continue reading

Attack report spreadsheet (updated)

swordshieldWith every new update, there is a chance some of my articles become outdated. I’m trying to keep track of the most important information and keep it updated, such as the Hero Equipment article. The old Battle report spreadsheet I posted some time ago was also in need of some improvements, as more than a few new troops have been introduced since the last version.

The updated spreadsheet now contains all the available troops, including the Tactical Troops, has boxes for additional information, better layout, and more useful information about the battle outcomes, such as absolute and relative tk/might ratios and a t1 equivalence calculation. This spreadsheet is handy to keep track of past battle performances without filling up your mailbox, and is great for analyzing why you got a certain ratio in a particular battle.

Download it through THIS link and have fun!

KoM 101: Getting through your first 7 days

bubbleWhen you start playing Kingdoms of Middle Earth, you are thrown into a busy, confusing world, with cities, wilds, goblins, alliances and players yelling in GC. It can be difficult to get a grasp of the many game aspects. I remember my starting point as extremely slow in hind sight…Figuring everything out by myself, occasionally guided by the KoM wiki, progressing ever so slowly. If I would have known what I know all now, progress would have been much faster.

This article is meant for new players who, instead of figuring out everything by themselves, want to get a head start. Starting a new game, you are placed in your safe bubble for 7 days. But how do you start your journey? What should you build and train, what aspects to focus on? All this and some more tips after the break!

Continue reading

Tactical Troops: All you need to know

mummakil

I have mentioned in past posts on campaigning and the latest update to the game, that new non-trainable ‘Tactical Troops’ had been introduced. Here, I will try to put all available information on these units. Any missing information will be added shortly. The new units are, in no particular order:

  • Pack Mammoths
  • Master Rangers
  • Stone Giants
  • Lyncean Raiders
  • Woodmen
  • Lake-town Pikemen
  • Lake-town Longbowmen

So what are they? What do they do? Where do you get them, and how should you use them. All that and perhaps more, after the break.

Continue reading

Tier 1-5 Attack/Life modifiers

troops compareI cannot believe I didnt do this sooner, but in updating the Campaign spreadsheet, I was going to add the Tier 4 and 5 numbers, until I realized I did not have the Attack and Life modifiers confirmed yet. And with that I mean the multiplication compared to Tier 1. For Tier 1, 2 and 3 it was easy to just follow the stars in the Barracks (1, 2 and 4 attack respectively), but for Tiers 4 and 5 it is a bit different. I’ve now figured them out.

Continue reading

Quick tip: Using Ent gear for Campaign

entRemember how I mentioned in my article on Hero equipment, that the Ent set is becoming popular to campaign with? That is because each piece of Ent set has two identical bonus attributes: 1% Life to ALL troops (so 2% per piece). But to be effective, do not just swap out all your gear to Ents just yet. To be most effective, use these pieces:

  • If your Hero has Pilfered gear, only use Ent weapon, cloak, amulet and/or ring*/**
  • Any sets lower than Pilfered can be freely exchanged for Ent.

*You don’t need to swap the Pilfered shield for Ent, as it deducts 2% standard life bonus for 2% bonus. See this chart.

**I don’t know whether the 5% life bonus of all 4 Ent pieces weighs up to the 5% attack loss compared to full Pilfered, but I’ve read that the Vitality score outweighs the Efficiency score in campaign, hence this set-up becoming more popular. Try at own risk 🙂

Hero equipment: All you need to know

Related:

!Scroll down for all available sets!

article header
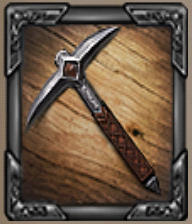
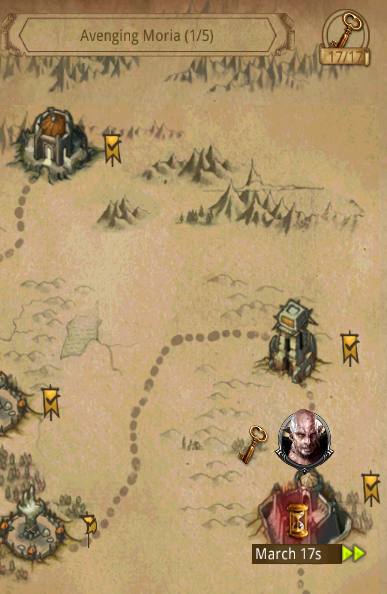
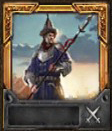
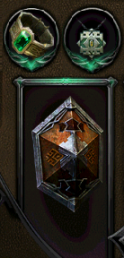
One of the most interesting updates to Kingdoms of Middle Earth recently has been the addition of Hero Equipment; Pieces of gear that heroes can equip that give them certain bonuses. But where do you find all the information about the gear? Where do you equip them on your heroes? Where can you see all the items’ bonuses and where are the icons explained? And where exactly do you find these items in the game to begin with?

This article will provide answers to all this and more, giving you a complete overview on one of the better additions to this game in months.

Continue reading